
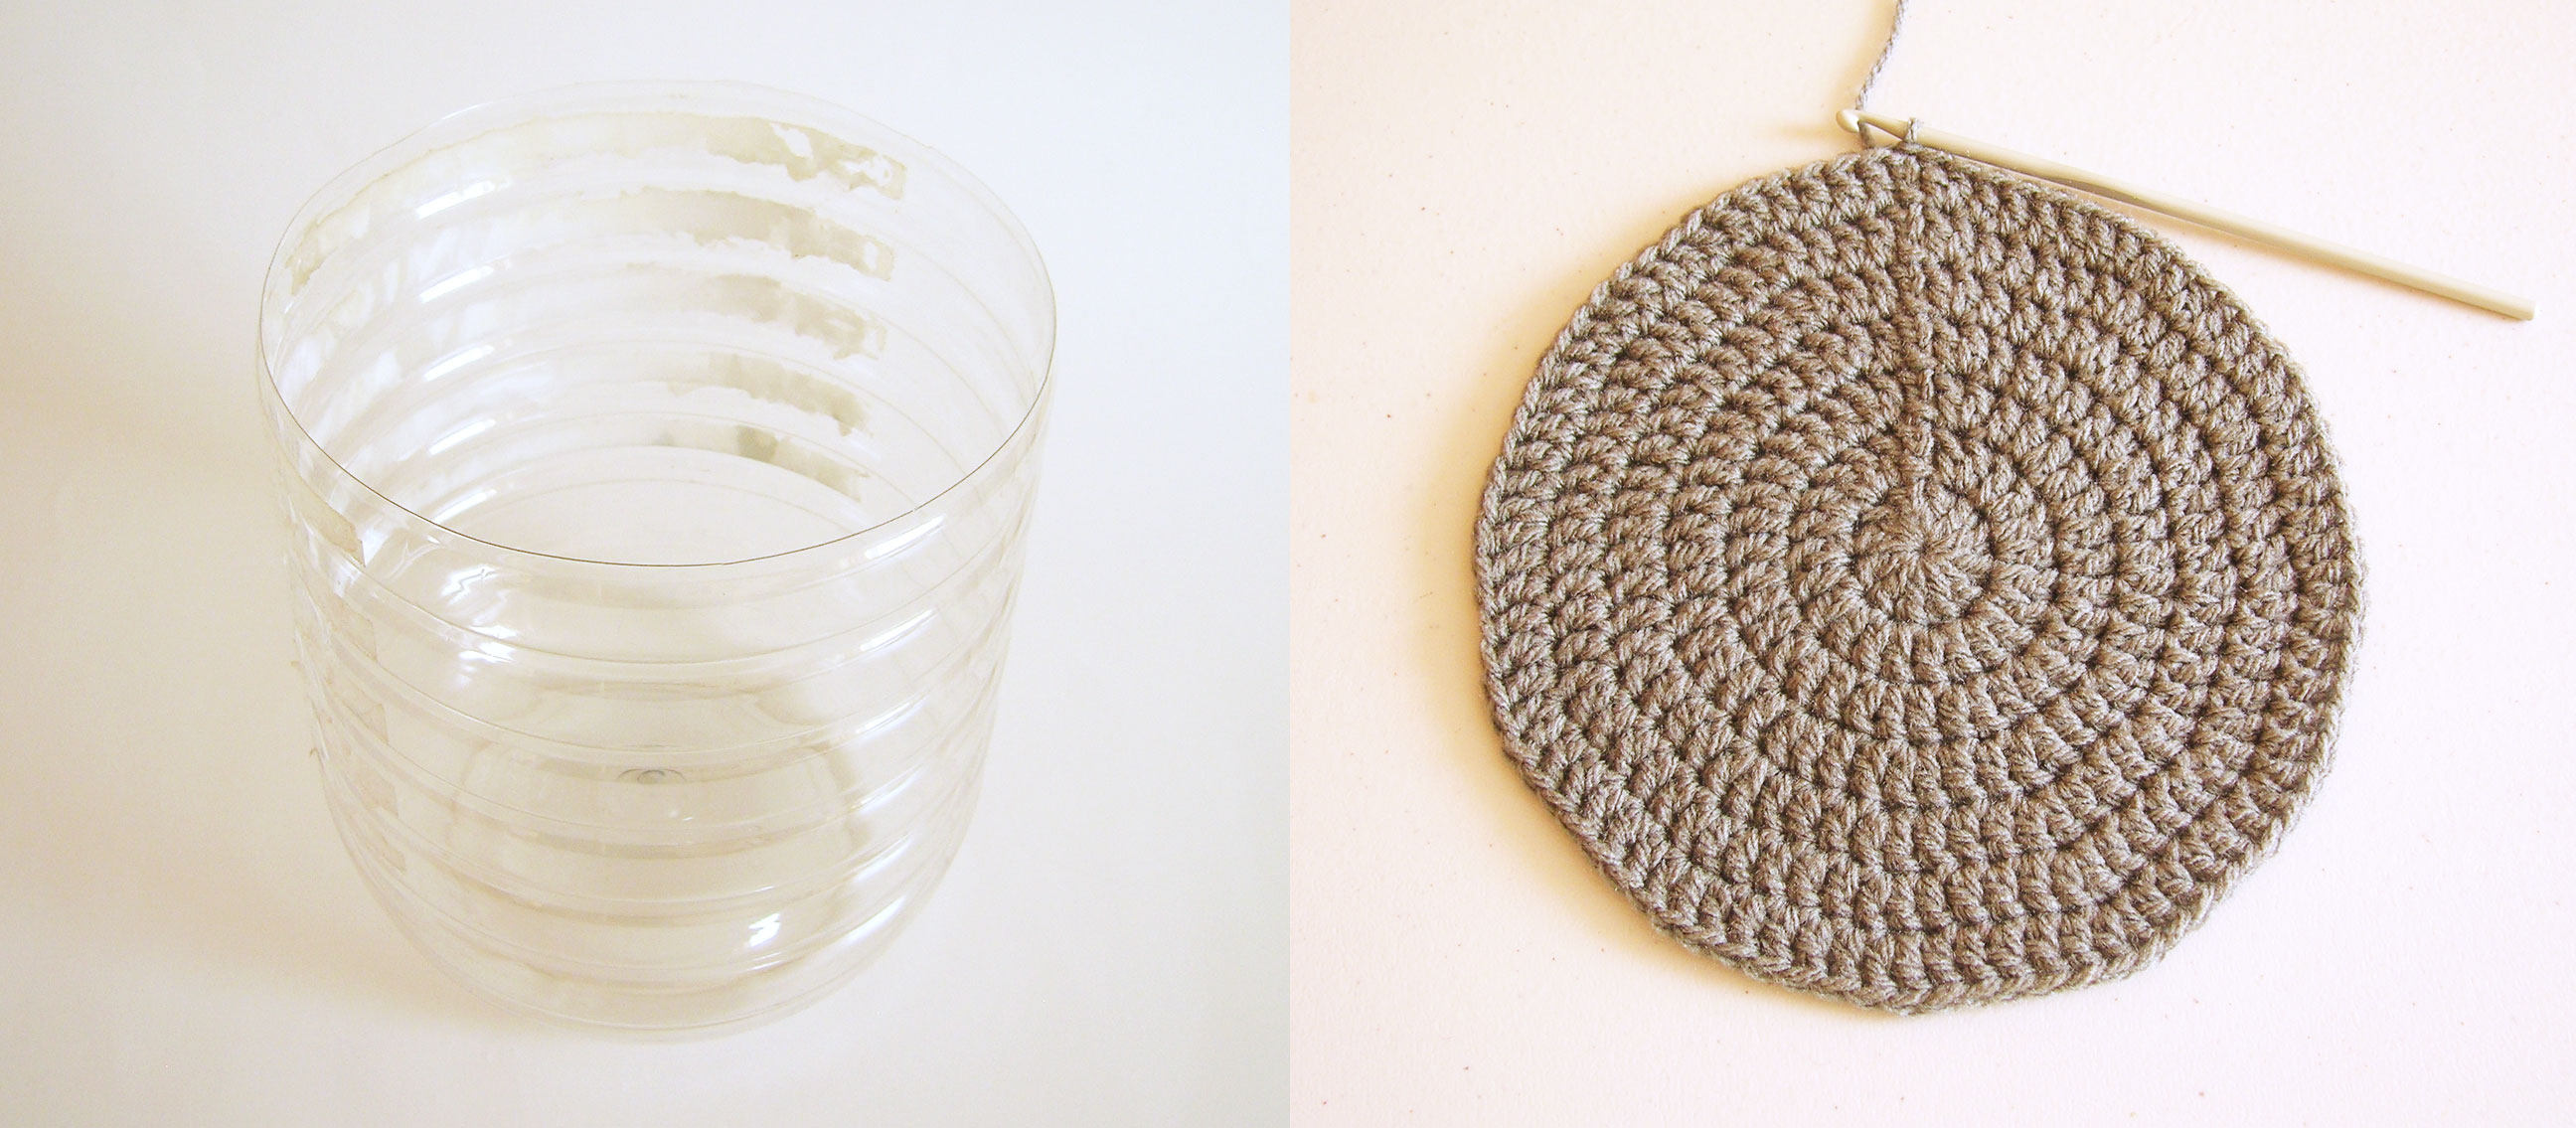
This is the kind of project in which we can recycle and take advantage of the craft we know to create a beautiful and useful piece. I used left over yarn, a 4 mm crochet hook and a 1.32 US gallons/ 5 lt plastic container. This last originally had floor cleaning liquid. It’s been a few years since my mom started recycling plastic bottles to use as storage solutions at home. And it’s such a good idea, this plastic is resistant, durable, and they come in so many sizes… So why not taking our hook and turning one of those into a good looking basket to store but also decorate our spaces.
Este es el tipo de proyecto en el que podemos reciclar y tomar ventaja de la manualidad que conocemos para crear una bella y útil pieza. Se usan sobrantes de estambre, un gancho de 4 mm y un envase plástico de 5 lt. Éste último contenía originalmente líquido limpia-pisos. Tiene algunos años que mi madre comenzó a reciclar este tipo de envases para almacenar y organizar distintas cosas en casa. Y me parece una idea muy buena, son muy resistentes, durables y vienen en distintos tamaños. Así que porqué no tomar nuestro ganchillo y convertir uno de ellos en una linda canasta para almacenar pero también decorar nuestros espacios.

To begin, cut the container according to the use you will give to it and the place where you’ll put it. You can cut this kind of plastic with regular scissors as it’s not so thick. Wash out the remainders of liquid or soap and remove the label. Now, you’ll start crocheting a cover. It’s all worked in the round in closed rows. Ch 3 and join last and first ch with ss.
R1: Ch 3, dc 11= 12 sts. All dc’s of this row must be made inside the ring formed by the first 3 ch that were closed with ss. The first 3 ch of every row replace the first dc. Ss in the 3rd ch to close this and every following row.
R2: (Ch 3, dc 1) in the first st, 2 dc in each of the next 11 sts= 24 sts
R3: Ch 3, 2 dc in next st, (dc 1, 2 dc in next st) rep ( ) 11 times= 36 sts
R4: Ch 3, dc 1, 2 dc in next st, (dc 2, 2 dc in next st) rep ( ) 11 times= 48 sts
R5: Ch 3, dc 2, 2 dc in next st, (dc 3, 2 dc in next st) rep ( ) 11 times= 60 sts
R6: Ch 3, dc 3, 2 dc in next st, (dc 4, 2 dc in next st) rep ( ) 11 times= 72 sts
R7: Ch 3, dc 4, 2 dc in next st, (dc 5, 2 dc in next st) rep ( ) 11 times= 84 sts
The goal is to cover the base of the container. Once it’s wide enough stop increasing sts.
Para empezar, cortar el envase de acuerdo al uso que se le dará y el lugar donde se colocará. Este tipo de plástico puede cortarse con tijeras normales ya que no es muy grueso. Quitar los restos de líquido o jabón y la etiqueta. Después se podrá empezar con la labor tejida para hacer una funda. Toda se teje en redondo en vtas. cerradas. Hacer 3 cad y unir la última y primer cad. con pd.
Vta. 1: 3 cad, 11 mac= 12 p. Todos los mac. de esta vta. deben ser tejidos dentro del aro que se formó al cerrar las 3 cad. de inicio. Las primeras 3 cad. de cada vta. sustituyen el primer mac. Hacer 1 pd. en la 3er cad. para cerrar esta y cada vta. siguiente.
Vta. 2: (3 cad, 1 mac) en el primer p, 2 mac en cada uno de los 11 p. sig= 24 p.
Vta. 3: 3 cad, 2 mac. en el sig. p, (1 mac, 2 mac. en el sig. p) rep ( ) 11 veces= 36 p.
Vta. 4: 3 cad, 1 mac, 2 mac. en el sig. p, (2 mac, 2 mac. en el sig. p) rep ( ) 11 veces= 48 p.
Vta. 5: 3 cad, 2 mac, 2 mac. en el sig. p, (3 mac, 2 mac. en el sig. p) rep ( ) 11 veces= 60 p.
Vta. 6: 3 cad, 3 mac, 2 mac. en el sig. p, (4 mac, 2 mac. en el sig. p) rep ( ) 11 veces= 72 p.
Vta. 7: 3 cad, 4 mac, 2 mac. en el sig. p, (5 mac, 2 mac. en el sig. p) rep ( ) 11 veces= 84 p.
El objetivo es abarcar la base del contenedor, una vez que es lo suficientemente ancho se deja de aumentar p.
R8: Ch 3, dc 83= 84 sts
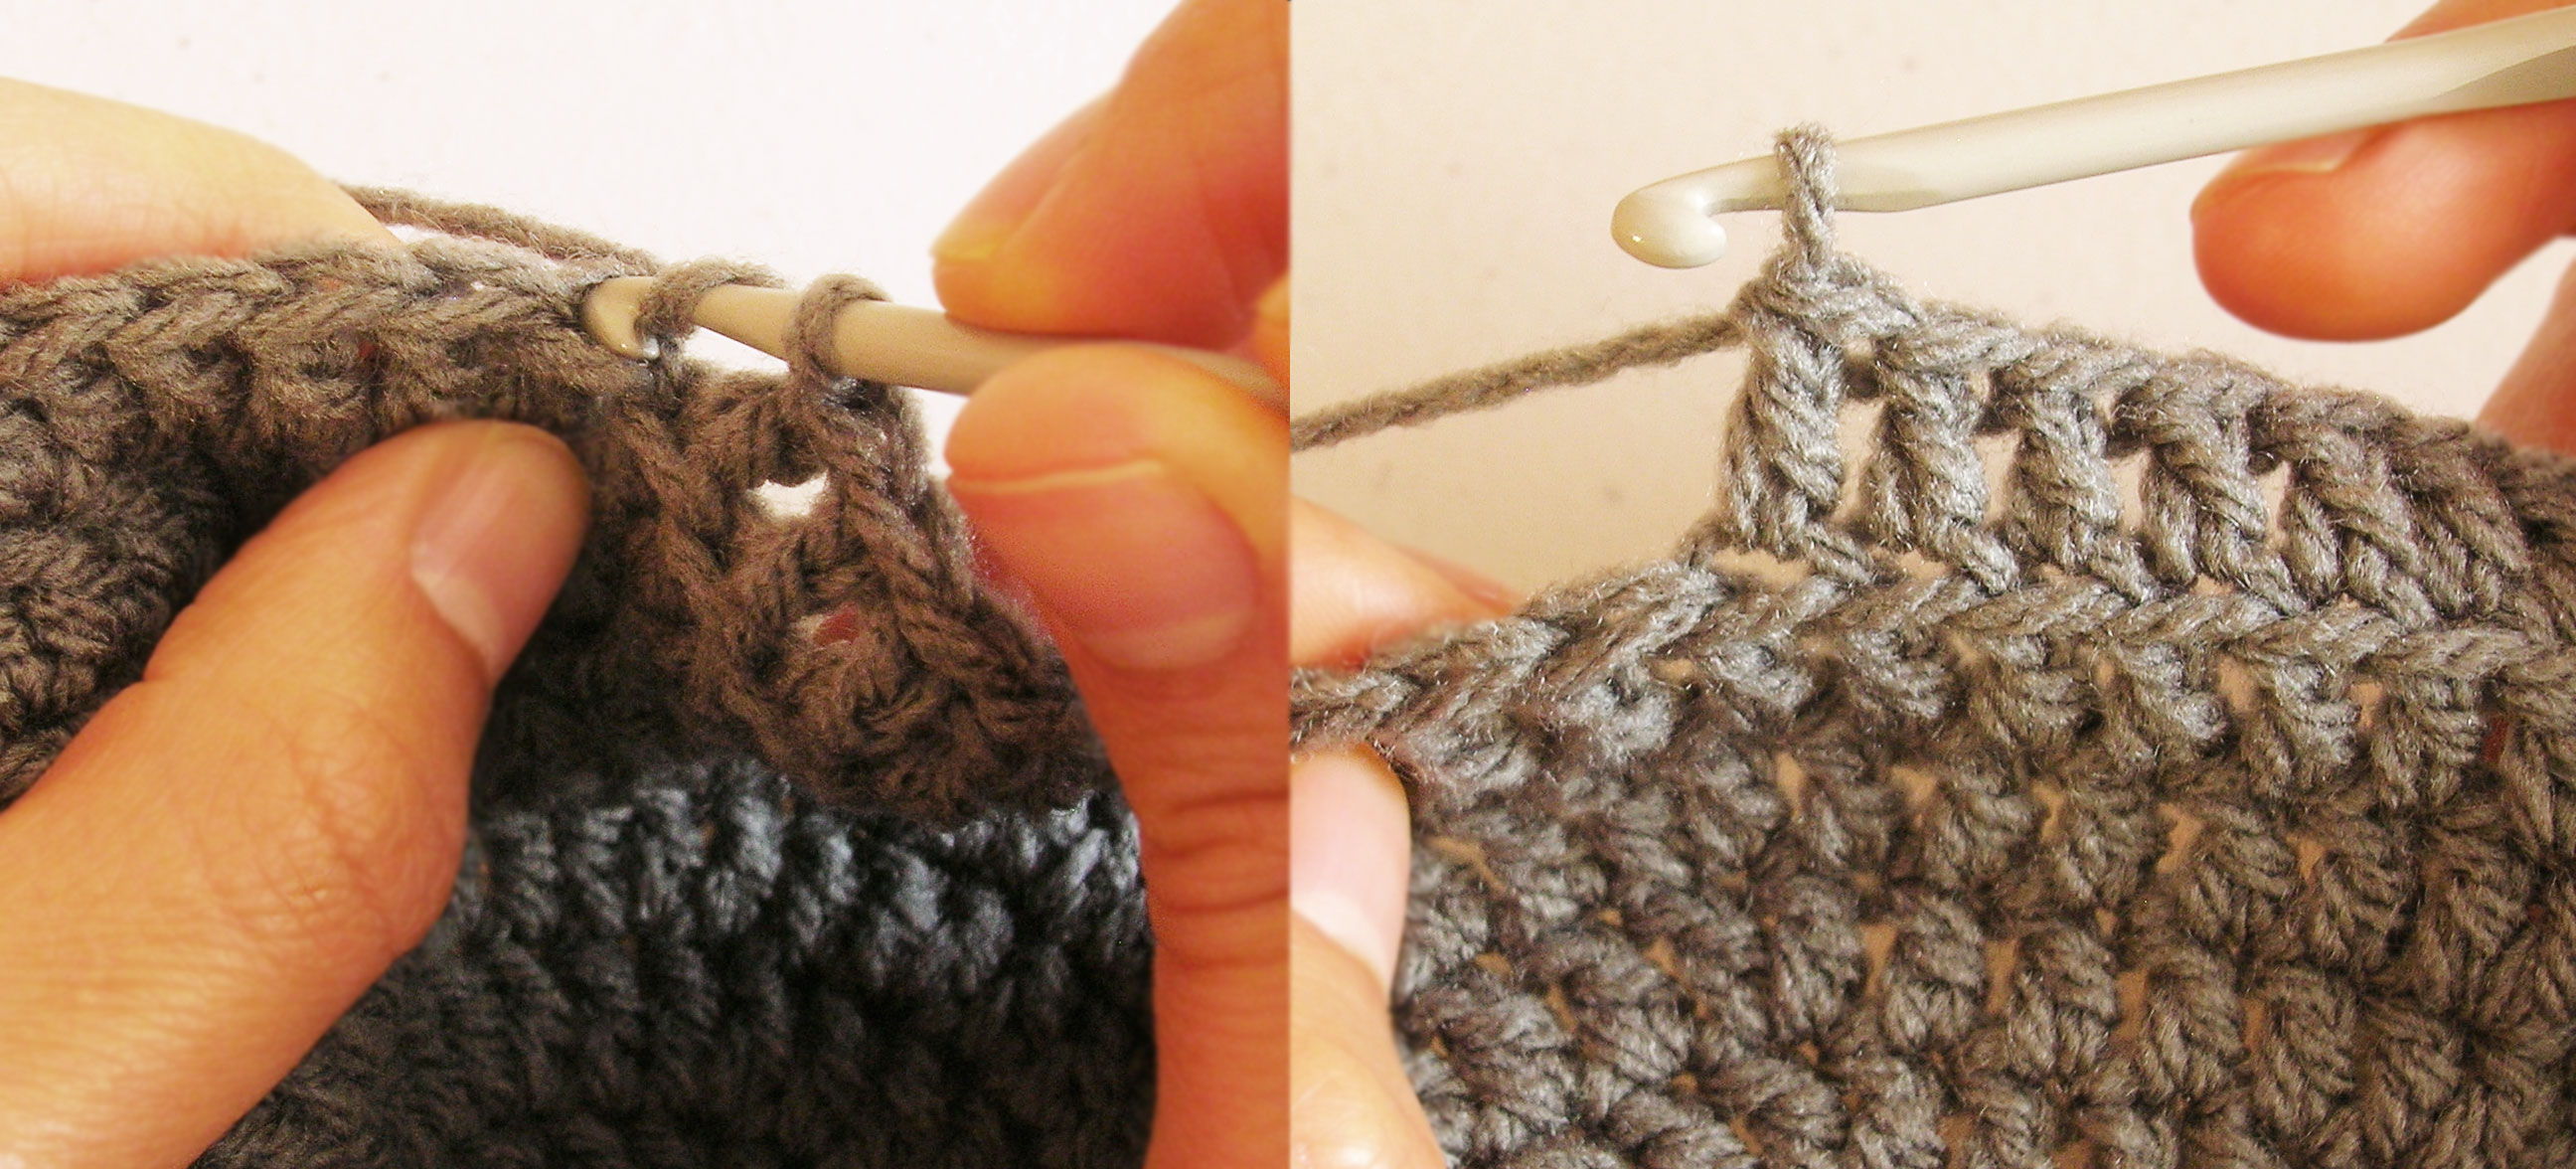
R9-22: Ch 3, dc 83 sts going through the back loop of the st only= 84 sts
The goal is to reach the container’s height.
Vta. 8: 3 cad, 83 mac= 84 p.
Vta. 9-22: 3 cad, 83 mac tomando solamente la hebra posterior del p= 84 p.
El objetivo es cubrir la altura del recipiente.
In order to get a better finishing make a little flap to cover the edge by decreasing sts.
R23: Ch 3, dc 4 , dec 1, (dc 5, dec 1) rep ( ) 11 times= 72 sts (still taking the back loop only in this and next two rows)
R24 and 25: Ch 3, dc 71= 72 sts
R26: Ch 1, sc 72. Ss in the first sc of this row.
Fasten off and weave in all ends, the crochet cover for your plastic box is ready.
Para poder dar un mejor terminado hacer una pequeña pestaña para cubrir la orilla, haciendo dism.
Vta. 23: 3 cad, 4 mac, 1 dism, (5 mac, 1 dism) rep ( ) 11 veces= 72 p. (aún tomando la hebra posterior del p. en esta y las sig. dos vtas)
Vta. 24 y 25: 3 cad, 71 mac= 72 p.
Vta. 26: 1 cad, 72 mp. 1 pd en el primer mp. de esta vta.
Rematar y esconder todas las hebras. La funda para el envase esta lista.

Use it for decoration and organizing rooms, I think it looks pretty nice and it can be done practically with any kind of yarn.
Se puede usar para decorar y organizar, creo que luce muy bien y se puede hacer prácticamente con cualquier estambre.


Tweet
ABBREVIATIONS
ch: chain
R: row
st: stitch
sc: single crochet (UK double crochet)
dc: double crochet (UK triple crochet)
ss: slip stitch
rep:repeat
dec: decrease
ABREVIATURAS
cad: cadena
vta: vuelta
p: punto
mp: medio punto (punto bajo)
mac: macizo (punto alto)
pd: punto deslizado (punto raso)
rep: repetir
sig: siguiente
dism: disminución
Gracias por escribir los patrones en castellano. Me gusta mucho tu blog.
Es un placer Florencia, y más cuando recibo comentarios como el tuyo, muchas gracias 🙂